深入SpringSecurity
环境介绍
SpringBoot:2.7.10spring-boot-starter-security:2.7.10SpringSecurity:5.7.7
导入依赖
<dependency>
    <groupId>org.springframework.boot</groupId>
    <artifactId>spring-boot-starter-security</artifactId>
</dependency>
基于表单认证
默认使用表单进行验证

密码由SpringSecurity自动生成,用户名为user.

基于HTTP basic认证
也可以换成HTTP basic类型的认证
加入使用下面的配置
import org.springframework.context.annotation.Configuration;
import org.springframework.security.config.annotation.web.builders.HttpSecurity;
import org.springframework.security.config.annotation.web.configuration.WebSecurityConfigurerAdapter;

@Configuration
public class BrowserSecurityConfig extends WebSecurityConfigurerAdapter {
    @Override
    protected void configure(HttpSecurity http) throws Exception {
        http.httpBasic() // httpBasic方式
                .and()
                .authorizeRequests() // 授权配置
                .anyRequest()  // 所有请求
                .authenticated(); // 都需要认证
    }
}
Spring Security提供了这种链式的方法调用。上面配置指定了认证方式为HTTP basic登录,并且所有请求都需要进行认证。
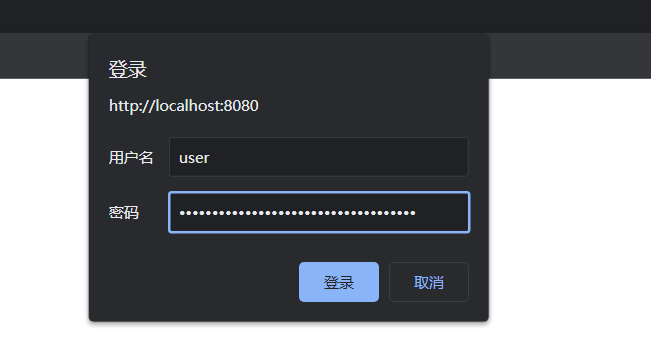
重启项目,可看到页面弹出了个HTTP Basic认证框
如果要切换回表单验证,可以直接将配置类删掉,或者修改为表单验证方式
import org.springframework.context.annotation.Configuration;
import org.springframework.security.config.annotation.web.builders.HttpSecurity;
import org.springframework.security.config.annotation.web.configuration.WebSecurityConfigurerAdapter;

@Configuration
public class BrowserSecurityConfig extends WebSecurityConfigurerAdapter {
    @Override
    protected void configure(HttpSecurity http) throws Exception {
        http.formLogin() // 表单方式
                .and()
                .authorizeRequests() // 授权配置
                .anyRequest()  // 所有请求
                .authenticated(); // 都需要认证
    }
}
自定义认证过程
自定义认证的过程需要实现Spring Security提供的UserDetailsService接口
public interface UserDetailsService {
    UserDetails loadUserByUsername(String username) throws UsernameNotFoundException;
}
loadUserByUsername方法返回一个UserDetail对象,该对象也是一个接口,包含一些用于描述用户信息的方法
public interface UserDetails extends Serializable {
    Collection<? extends GrantedAuthority> getAuthorities();

    String getPassword();

    String getUsername();

    boolean isAccountNonExpired();

    boolean isAccountNonLocked();

    boolean isCredentialsNonExpired();

    boolean isEnabled();
}
这些方法的含义如下:
getAuthorities获取用户包含的权限,返回权限集合,权限是一个继承了GrantedAuthority的对象;getPassword和getUsername用于获取密码和用户名;isAccountNonExpired方法返回boolean类型,用于判断账户是否未过期,未过期返回true反之返回false;isAccountNonLocked方法用于判断账户是否未锁定;isCredentialsNonExpired用于判断用户凭证是否没过期,即密码是否未过期;isEnabled方法用于判断用户是否可用。
实际中我们可以自定义
UserDetails接口的实现类,也可以直接使用Spring Security提供的UserDetails接口实现类org.springframework.security.core.userdetails.User
创建一个实体类
@Data
public class MyUser implements Serializable {
    private static final long serialVersionUID = 7225349028293972637L;
    private String userName;
    private String password;
    // 用户未过期
    private boolean accountNonExpired = true;
    // 用户未锁定
    private boolean accountNonLocked= true;
    // 权限认证未过期
    private boolean credentialsNonExpired= true;
    // 用户可用
    private boolean enabled= true;
}
接着创建MyUserDetailService实现UserDetailService:
@Configuration
public class UserDetailService implements UserDetailsService {

    @Autowired
    private PasswordEncoder passwordEncoder;

    @Override
    public UserDetails loadUserByUsername(String username) throws UsernameNotFoundException {
        // 模拟一个用户,替代数据库获取逻辑
        MyUser user = new MyUser();
        user.setUserName(username);
        user.setPassword(this.passwordEncoder.encode("123456"));
        // 输出加密后的密码
        System.out.println(user.getPassword());

        return new User(username, user.getPassword(), user.isEnabled(),
                user.isAccountNonExpired(), user.isCredentialsNonExpired(),
                user.isAccountNonLocked(), AuthorityUtils.commaSeparatedStringToAuthorityList("admin"));
    }
}
上面使用了PasswordEncoder对明文密码加密,我们需要在配置类中进行注册。
@Configuration
public class BrowserSecurityConfig extends WebSecurityConfigurerAdapter {
	/**
	 * 明文密码加密
	 * @return
	 */
    @Bean
    public PasswordEncoder passwordEncoder() {
        return new BCryptPasswordEncoder();
    }
    ...
}
这里我们使用了org.springframework.security.core.userdetails.User类包含7个参数的构造器,其还包含一个三个参数的构造器User(String username, String password,Collection<? extends GrantedAuthority> authorities),由于权限参数不能为空,所以这里先使用AuthorityUtils.commaSeparatedStringToAuthorityList方法模拟一个admin的权限,该方法可以将逗号分隔的字符串转换为权限集合。
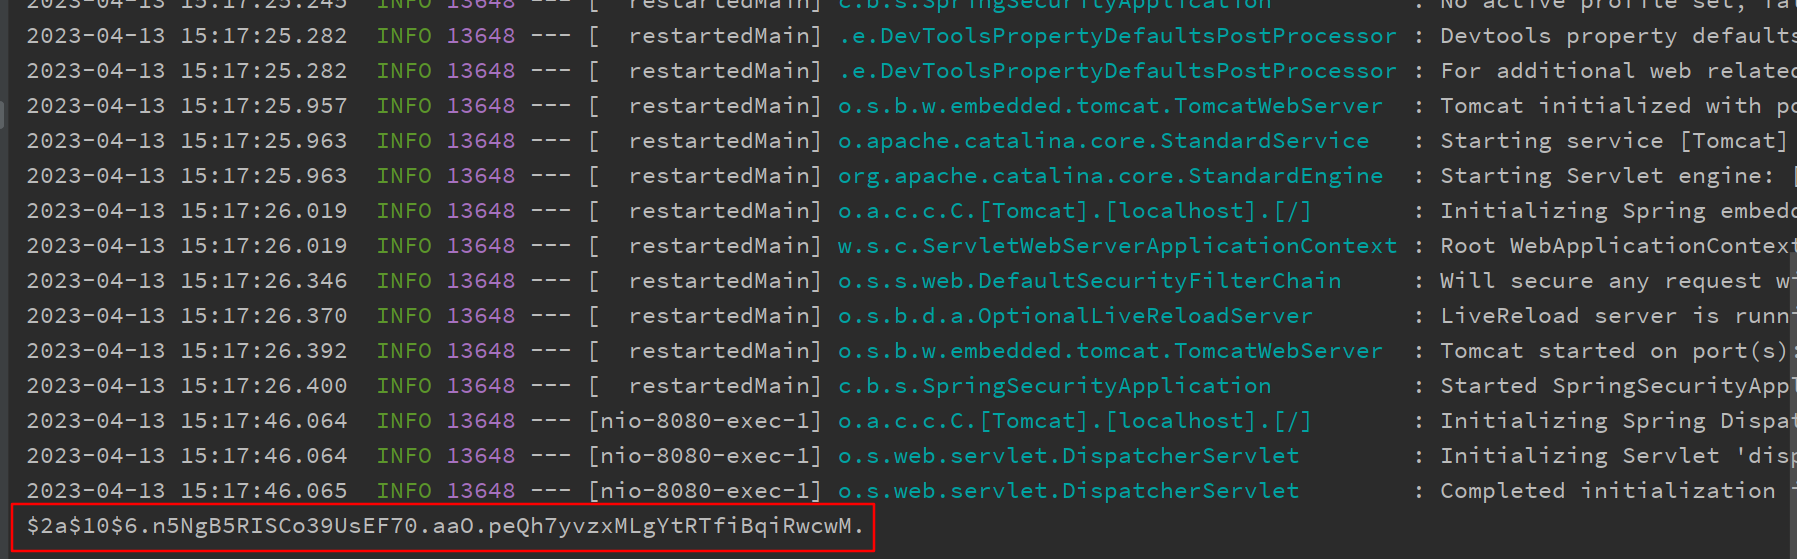
重启项目,访问http://localhost:8080/login,便可以使用任意用户名以及123456作为密码登录系统。可以看到控制台输出的加密后的密码(每次执行生成的密码不一样)
自定义登录页
在resources/static/下新建一个login.html:
<!DOCTYPE html>
<html>
<head>
    <meta charset="UTF-8">
    <title>登录</title>
     <link rel="stylesheet" href="css/login.css" type="text/css">
</head>
<body>
<form class="login-page" action="/login" method="post">
    <div class="form">
        <h3>账户登录</h3>
        <input type="text" placeholder="用户名" name="username" required="required" /><br/>
        <input type="password" placeholder="密码" name="password" required="required" /><br/>
        <button type="submit">登录</button>
    </div>
</form>
</body>
</html>
login.css如下:
.login-page {
    width: 360px;
    padding: 8% 0 0;
    margin: auto;
}
.form {
    position: relative;
    z-index: 1;
    background: #ffffff;
    max-width: 360px;
    margin: 0 auto 100px;
    padding: 45px;
    text-align: center;
    box-shadow: 0 0 20px 0 rgba(0, 0, 0, 0.2), 0 5px 5px 0 rgba(0, 0, 0, 0.24);
}
.form input {
    outline: 0;
    background: #f2f2f2;
    width: 100%;
    border: 0;
    margin: 0 0 15px;
    padding: 15px;
    box-sizing: border-box;
    font-size: 14px;
}
.form button {
    text-transform: uppercase;
    outline: 0;
    background: #4caf50;
    width: 100%;
    border: 0;
    padding: 15px;
    color: #ffffff;
    font-size: 14px;
    -webkit-transition: all 0.3 ease;
    transition: all 0.3 ease;
    cursor: pointer;
}
.form button:hover,
.form button:active,
.form button:focus {
    background: #43a047;
}
.form .message {
    margin: 15px 0 0;
    color: #b3b3b3;
    font-size: 12px;
}
.form .message a {
    color: #4caf50;
    text-decoration: none;
}
.form .register-form {
    display: none;
}
.container {
    position: relative;
    z-index: 1;
    max-width: 300px;
    margin: 0 auto;
}
.container:before,
.container:after {
    content: "";
    display: block;
    clear: both;
}
.container .info {
    margin: 50px auto;
    text-align: center;
}
.container .info h1 {
    margin: 0 0 15px;
    padding: 0;
    font-size: 36px;
    font-weight: 300;
    color: #1a1a1a;
}
.container .info span {
    color: #4d4d4d;
    font-size: 12px;
}
.container .info span a {
    color: #000000;
    text-decoration: none;
}
.container .info span .fa {
    color: #ef3b3a;
}
body {
    background: #76b852; /* fallback for old browsers */
    background: -webkit-linear-gradient(right, #76b852, #8dc26f);
    background: -moz-linear-gradient(right, #76b852, #8dc26f);
    background: -o-linear-gradient(right, #76b852, #8dc26f);
    background: linear-gradient(to left, #76b852, #8dc26f);
    font-family: Lato,"PingFang SC","Microsoft YaHei",sans-serif;
}
修改BrowserSecurityConfig中的configure方法
Override
    protected void configure(HttpSecurity http) throws Exception {
        http.formLogin() // 表单登录
        .loginPage("/login.html") // 登录页
        .loginProcessingUrl("/login")  // 处理表单登录URL
        .and()
        .authorizeRequests() // 授权配置
        .antMatchers("/login.html","/css/*").permitAll() // 未登录时允许访问login.html
        .anyRequest()  // 所有请求
        .authenticated() // 除放行的链接和资源其他都需要认证
        .and()
        .csrf().disable(); // 关闭csrf
}
上面代码中.loginPage("/login.html")指定了跳转到登录页面的请求URL,.loginProcessingUrl("/login")对应登录页面form表单的action="/login",.antMatchers("/login.html").permitAll()表示跳转到登录页面的请求不被拦截,否则会进入无限循环。
这时候启动系统,访问http://localhost:8080/hello,会看到页面已经被重定向到了http://localhost:8080/login.html

假如有这样一个需求:在未登录的情况下,当用户访问html资源的时候跳转到登录页,未登录下其他访问请求则返回"您访问的资源需要身份认证!",状态码为401。
要实现这个功能我们将loginPage的URL改为/authentication/require,并且在antMatchers方法中加入该URL,让其免拦截。
1.修改BrowserSecurityConfig中的configure方法
Override
    protected void configure(HttpSecurity http) throws Exception {
        http.formLogin() // 表单登录
        .loginPage("/authentication/require") // 登录跳转 URL
        .loginProcessingUrl("/login")  // 处理表单登录URL
        .and()
        .authorizeRequests() // 授权配置
        .antMatchers("/authentication/require","/login.html").permitAll() // 未登录时允许访问login.html
        .anyRequest()  // 所有请求
        .authenticated() // 除放行的链接和资源其他都需要认证
        .and()
        .csrf().disable(); // 关闭csrf
}
2.新增一个BrowserSecurityController用来处理请求
@RestController
public class BrowserSecurityController {
    private RequestCache requestCache = new HttpSessionRequestCache();
    private RedirectStrategy redirectStrategy = new DefaultRedirectStrategy();

    @GetMapping("/authentication/require")
    @ResponseStatus(HttpStatus.UNAUTHORIZED) // 状态码401
    public String requireAuthentication(HttpServletRequest request, HttpServletResponse response) throws IOException {
        SavedRequest savedRequest = requestCache.getRequest(request,response);
        if (savedRequest != null) {
            String targetUrl = savedRequest.getRedirectUrl();
            if (StringUtils.endsWithIgnoreCase(targetUrl,".html")) {
                redirectStrategy.sendRedirect(request,response,"/login.html");
            }
        }
        return "您访问的资源需要身份认证!";
    }
}
其中HttpSessionRequestCache为Spring Security提供的用于缓存请求的对象,通过调用它的getRequest方法可以获取到本次请求的HTTP信息。DefaultRedirectStrategy的sendRedirect为Spring Security提供的用于处理重定向的方法
上面代码获取了引发跳转的请求,根据请求是否以.html为结尾来对应不同的处理方法。如果是以.html结尾,那么重定向到登录页面,否则返回”访问的资源需要身份认证!”信息,并且HTTP状态码为401(HttpStatus.UNAUTHORIZED)
这样当我们访问http://localhost:8080/hello的时候页面便会跳转到http://localhost:8080/authentication/require,并且输出”访问的资源需要身份认证!”,当我们访问http://localhost:8080/hello.html的时候,页面将会跳转到登录页面
自定义登录成功逻辑
Spring Security有一套默认的处理登录成功和失败的方法:当用户登录成功时,页面会跳转会引发登录的请求,比如在未登录的情况下访问http://localhost:8080/hello,页面会跳转到登录页,登录成功后再跳转回来;登录失败时则是跳转到Spring Security默认的错误提示页面。
下面我们通过一些自定义配置来替换这套默认的处理机制。
首先,需要自定义AuthenticationSuccessHandler 接口实现类
@Component
public class MyAuthenticationSucessHandler implements AuthenticationSuccessHandler {
    @Resource
    private ObjectMapper mapper;

    @Override
    public void onAuthenticationSuccess(HttpServletRequest request, HttpServletResponse response,
                                        Authentication authentication) throws IOException, ServletException {
        response.setContentType("application/json;charset=utf-8");
        response.getWriter().write(mapper.writeValueAsString(authentication));
    }
}
其中Authentication参数既包含了认证请求的一些信息,比如IP,请求的SessionId等,也包含了用户信息,即前面提到的User对象。通过上面这个配置,用户登录成功后页面将打印出Authentication对象的信息。
要使这个配置生效,我们还的在BrowserSecurityConfig的configure中配置它:
@Override
protected void configure(HttpSecurity http) throws Exception {
    http.formLogin()
        .loginPage("/authentication/require")
        .loginProcessingUrl("/login")
        .successHandler(myAuthenticationSuccessHandler)
        .and()
        .authorizeRequests() // 授权配置
        .antMatchers("/authentication/require","/login.html","/css/*").permitAll()
        .anyRequest()
        .authenticated()
        .and()
        .csrf().disable();
}
我们将MyAuthenticationSucessHandler注入进来,并通过successHandler方法进行配置。
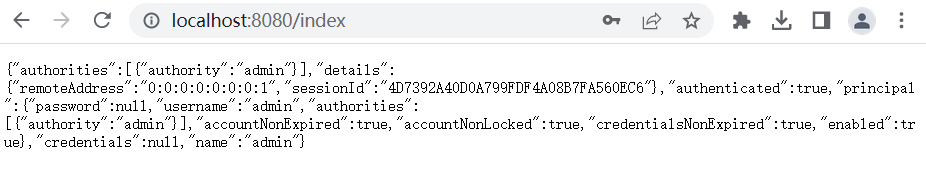
这时候重启项目登录后页面将会输出如下JSON信息:
{
    "authorities":[
        {
            "authority":"admin"
        }
    ],
    "details":{
        "remoteAddress":"0:0:0:0:0:0:0:1",
        "sessionId":"EBD9FD941653AE07B9485FB3D342E6D0"
    },
    "authenticated":true,
    "principal":{
        "password":null,
        "username":"admin",
        "authorities":[
            {
                "authority":"admin"
            }
        ],
        "accountNonExpired":true,
        "accountNonLocked":true,
        "credentialsNonExpired":true,
        "enabled":true
    },
    "credentials":null,
    "name":"admin"
}
像password,credentials这些敏感信息,Spring Security已经将其屏蔽。
除此之外,我们也可以在登录成功后做页面的跳转,修改MyAuthenticationSucessHandler:
@Component
public class MyAuthenticationSuccessHandler implements AuthenticationSuccessHandler {

    private RequestCache requestCache = new HttpSessionRequestCache();
    private RedirectStrategy redirectStrategy = new DefaultRedirectStrategy();

    @Override
    public void onAuthenticationSuccess(HttpServletRequest request,
                                        HttpServletResponse response,
                                        Authentication authentication)
            throws IOException{
        SavedRequest savedRequest = requestCache.getRequest(request,response);
        redirectStrategy.sendRedirect(request,response, savedRequest.getRedirectUrl());
    }
}
跳转指定链接也可以,例如登录成功后跳转到http://localhost:8080/index
@Component
public class MyAuthenticationSuccessHandler implements AuthenticationSuccessHandler {

    private RedirectStrategy redirectStrategy = new DefaultRedirectStrategy();

    @Override
    public void onAuthenticationSuccess(HttpServletRequest request,
                                        HttpServletResponse response,
                                        Authentication authentication)
            throws IOException{
        redirectStrategy.sendRedirect(request,response, "/index");
    }
}
登录成功后,便可以使用SecurityContextHolder.getContext().getAuthentication()获取到Authentication对象信息。
@GetMapping("index")
public Object index(){
    return SecurityContextHolder.getContext().getAuthentication();
}
除了通过这种方式获取Authentication对象信息外,也可以使用下面这种方式:
@GetMapping("index")
public Object index(Authentication authentication){
    return authentication;
}
自定义登录失败逻辑
和自定义登录成功处理逻辑类似,自定义登录失败处理逻辑首先需要实现org.springframework.security.web.authentication.AuthenticationFailureHandler的onAuthenticationFailure方法:
@Component
public class MyAuthenticationFailureHandler implements AuthenticationFailureHandler {

    @Autowired
    private ObjectMapper mapper;

    @Override
    public void onAuthenticationFailure(HttpServletRequest request, HttpServletResponse response,
                                        AuthenticationException exception) throws IOException {
        response.setStatus(HttpStatus.INTERNAL_SERVER_ERROR.value());
        response.setContentType("application/json;charset=utf-8");
        response.getWriter().write(mapper.writeValueAsString(exception.getMessage()));
    }
}
onAuthenticationFailure方法的AuthenticationException参数是一个抽象类,Spring Security根据登录失败的原因封装了许多对应的实现类。不同的失败原因对应不同的异常,比如用户名或密码错误对应的是BadCredentialsException,用户不存在对应的是UsernameNotFoundException,用户被锁定对应的是LockedException等。
状态码定义为500(HttpStatus.INTERNAL_SERVER_ERROR.value()),即系统内部异常。
然后在BrowserSecurityConfig中配置MyAuthenticationFailureHandler
@Configuration
public class BrowserSecurityConfig extends WebSecurityConfigurerAdapter {

    @Autowired
    private MyAuthenticationSuccessHandler myAuthenticationSuccessHandler;

    @Autowired
    private MyAuthenticationFailureHandler myAuthenticationFailureHandler;

    @Override
    protected void configure(HttpSecurity http) throws Exception {

        http.formLogin() // 表单登录
                .loginPage("/authentication/require")
                .loginProcessingUrl("/login")
                .successHandler(myAuthenticationSuccessHandler) // 配置自定义登录成功的handler
                .failureHandler(myAuthenticationFailureHandler) // 配置自定义登录失败的handler
                .and()
                .authorizeRequests() // 授权配置
                .antMatchers("/authentication/require","/login.html","/css/*").permitAll()
                .anyRequest()  // 所有请求
                .authenticated()
                .and()
                .csrf().disable(); // 都需要认证
    }
	...
}
比如输入错误的密码,会返回下面的信息
"用户名或密码错误"
添加图形验证码
导入依赖
<dependency>
    <groupId>org.springframework.social</groupId>
    <artifactId>spring-social-config</artifactId>
    <version>1.1.6.RELEASE</version>
</dependency>
生成验证码
创建验证码对象ImageCode
@Data
public class ImageCode {

    private BufferedImage image; // 图片

    private String code; // 验证码

    private LocalDateTime expireTime; // 过期时间

    public ImageCode(BufferedImage image, String code, int expireIn) {
        this.image = image;
        this.code = code;
        this.expireTime = LocalDateTime.now().plusSeconds(expireIn);
    }

    public ImageCode(BufferedImage image, String code, LocalDateTime expireTime) {
        this.image = image;
        this.code = code;
        this.expireTime = expireTime;
    }

    boolean isExpire() {
        return LocalDateTime.now().isAfter(expireTime);
    }
}
ImageCode对象包含了三个属性:image图片,code验证码和expireTime过期时间。isExpire方法用于判断验证码是否已过期。
接着定义一个ValidateCodeController,用于处理生成验证码请求:
@RestController
public class ValidateCodeController {

    public final static String SESSION_KEY_IMAGE_CODE = "SESSION_KEY_IMAGE_CODE";

    private final SessionStrategy sessionStrategy = new HttpSessionSessionStrategy();

    @GetMapping("/code/image")
    public void createCode(HttpServletRequest request, HttpServletResponse response) throws IOException{
        ImageCode imageCode = ImageCodeUtils.createImageCode();
        sessionStrategy.setAttribute(new ServletWebRequest(request), SESSION_KEY_IMAGE_CODE, imageCode);
        ImageIO.write(imageCode.getImage(), "jpeg", response.getOutputStream());
    }
}
验证码生成类如下:
package cc.bnblogs.springsecurity.utils;


import cc.bnblogs.springsecurity.pojo.ImageCode;

import java.awt.*;
import java.awt.image.BufferedImage;
import java.util.Random;

/**
 * 生成图形验证码
 */
public class ImageCodeUtils {
    public static ImageCode createImageCode() {

        int width = 270; // 验证码图片宽度
        int height = 36; // 验证码图片长度
        int length = 4; // 验证码位数
        int expireIn = 60; // 验证码有效时间 60s

        BufferedImage image = new BufferedImage(width, height, BufferedImage.TYPE_INT_RGB);
        Graphics g = image.getGraphics();

        Random random = new Random();

        g.setColor(getRandColor(200, 250));
        g.fillRect(0, 0, width, height);
        g.setFont(new Font("Times New Roman", Font.ITALIC, 20));
        g.setColor(getRandColor(160, 200));
        for (int i = 0; i < 155; i++) {
            int x = random.nextInt(width);
            int y = random.nextInt(height);
            int xl = random.nextInt(12);
            int yl = random.nextInt(12);
            g.drawLine(x, y, x + xl, y + yl);
        }

        StringBuilder sRand = new StringBuilder();
        for (int i = 0; i < length; i++) {
            String rand = String.valueOf(random.nextInt(10));
            sRand.append(rand);
            g.setColor(new Color(20 + random.nextInt(110), 20 + random.nextInt(110), 20 + random.nextInt(110)));
            g.drawString(rand, 100 + 13 * i + 6, 24);
        }
        g.dispose();
        return new ImageCode(image, sRand.toString(), expireIn);
    }

    private static Color getRandColor(int fc, int bc) {
        Random random = new Random();
        if (fc > 255) {
            fc = 255;
        }
        if (bc > 255) {
            bc = 255;
        }
        int r = fc + random.nextInt(bc - fc);
        int g = fc + random.nextInt(bc - fc);
        int b = fc + random.nextInt(bc - fc);
        return new Color(r, g, b);
    }
}
createImageCode方法用于生成验证码对象,org.springframework.social.connect.web.HttpSessionSessionStrategy对象封装了一些处理Session的方法,包含了setAttribute、getAttribute和removeAttribute方法,具体可以查看该类的源码。使用sessionStrategy将生成的验证码对象存储到Session中,并通过IO流将生成的图片输出到登录页面上。
要使生成验证码的请求不被拦截,需要在BrowserSecurityConfig的configure方法中配置免拦截:
@Override
protected void configure(HttpSecurity http) throws Exception {
    http.formLogin()
        .loginPage("/authentication/require")
        .loginProcessingUrl("/login")
        .successHandler(myAuthenticationSuccessHandler)
        .failureHandler(myAuthenticationFailureHandler)
        .and()
        .authorizeRequests()
        .antMatchers("/authentication/require",
                     "/login.html",
                     "/css/*",
                     "/code/image").permitAll() // 放行"/code/image"请求
        .anyRequest()
        .authenticated()
        .and()
        .csrf().disable();
}
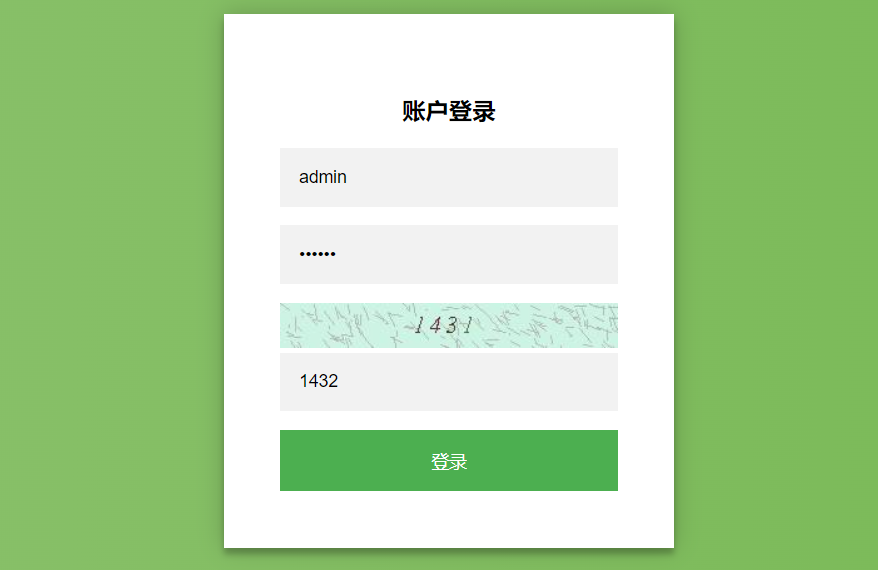
修改login.html页面
<!DOCTYPE html>
<html>
<head>
    <meta charset="UTF-8">
    <title>登录</title>
    <link rel="stylesheet" href="css/login.css" type="text/css">
</head>
<body>
<form class="login-page" action="/login" method="post">
    <div class="form">
        <h3>账户登录</h3>
        <input type="text" placeholder="用户名" name="username" required="required" /><br/>
        <input type="password" placeholder="密码" name="password" required="required" /><br/>
        <img src="/code/image"/>
        <input type="text" name="imageCode" placeholder="请输入验证码" />
        <button type="submit">登录</button>
    </div>
</form>
</body>
</html>
成功生成验证码!

认证流程添加验证码校验
在校验验证码的过程中,可能会抛出各种验证码类型的异常,比如“验证码错误”、“验证码已过期”等
首先自定义一个验证码异常类
public class ValidateCodeException extends AuthenticationException {
    private static final long serialVersionUID = -2205230712358933815L;

    ValidateCodeException(String message) {
        super(message);
    }
}
Spring Security实际上是由许多过滤器组成的过滤器链,处理用户登录逻辑的过滤器为UsernamePasswordAuthenticationFilter,而验证码校验过程应该是在这个过滤器之前的,即只有验证码校验通过后才去校验用户名和密码。
由于Spring Security并没有直接提供验证码校验相关的过滤器接口,所以自己定义一个验证码校验的过滤器ValidateCodeFilter
/**
 * 本过滤器只会校验一次
 */
@Component
public class ValidateCodeFilter extends OncePerRequestFilter {

    @Autowired
    private AuthenticationFailureHandler authenticationFailureHandler;

    private SessionStrategy sessionStrategy = new HttpSessionSessionStrategy();

    @Override
    protected void doFilterInternal(HttpServletRequest httpServletRequest, HttpServletResponse httpServletResponse,
                                    FilterChain filterChain) throws ServletException, IOException {

        if (StringUtils.equalsIgnoreCase("/login", httpServletRequest.getRequestURI())
            && StringUtils.equalsIgnoreCase(httpServletRequest.getMethod(), "post")) {
            try {
                validateCode(new ServletWebRequest(httpServletRequest));
            } catch (ValidateCodeException e) {
                authenticationFailureHandler.onAuthenticationFailure(httpServletRequest, httpServletResponse, e);
                return;
            }
        }
        filterChain.doFilter(httpServletRequest, httpServletResponse);
    }

    /**
     * 验证码校验
     * @param servletWebRequest
     * @throws ServletRequestBindingException
     */
    private void validateCode(ServletWebRequest servletWebRequest) throws ServletRequestBindingException {
        ImageCode codeInSession = (ImageCode) sessionStrategy.getAttribute(servletWebRequest,
                                                                           ValidateCodeController.SESSION_KEY_IMAGE_CODE);
        String codeInRequest = ServletRequestUtils.getStringParameter(servletWebRequest.
                                                                      getRequest(), "imageCode");

        if (StringUtils.isBlank(codeInRequest)) {
            throw new ValidateCodeException("验证码不能为空!");
        }
        if (codeInSession == null) {
            throw new ValidateCodeException("验证码不存在!");
        }
        if (codeInSession.isExpire()) {
            sessionStrategy.removeAttribute(servletWebRequest, ValidateCodeController.SESSION_KEY_IMAGE_CODE);
            throw new ValidateCodeException("验证码已过期!");
        }
        if (!StringUtils.equalsIgnoreCase(codeInSession.getCode(), codeInRequest)) {
            throw new ValidateCodeException("验证码不正确!");
        }
        sessionStrategy.removeAttribute(servletWebRequest, ValidateCodeController.SESSION_KEY_IMAGE_CODE);

    }
}
ValidateCodeFilter继承了org.springframework.web.filter.OncePerRequestFilter,该过滤器只会执行一次。
在doFilterInternal方法中我们判断了请求URL是否为/login,该路径对应登录form表单的action路径,请求的方法是否为**POST**,是的话进行验证码校验逻辑,否则直接执行filterChain.doFilter让代码往下走。当在验证码校验的过程中捕获到异常时,调用Spring Security的校验失败处理器AuthenticationFailureHandler进行处理。
验证码校验逻辑:
从Session中获取了ImageCode对象和请求参数imageCode(对应登录页面的验证码<input>框name属性),然后进行了各种判断并抛出相应的异常。当验证码过期或者验证码校验通过时,我们便可以删除Session中的ImageCode属性了。
验证码校验过滤器定义好了,怎么才能将其添加到
UsernamePasswordAuthenticationFilter前面呢?
很简单,只需要在BrowserSecurityConfig的configure方法中添加些许配置即可,修改后的configure方法如下:
@Autowired
private ValidateCodeFilter validateCodeFilter;

@Override
protected void configure(HttpSecurity http) throws Exception {
    // 在检验用户名和密码前先校验验证码
    http.addFilterBefore(validateCodeFilter, UsernamePasswordAuthenticationFilter.class)
        .formLogin()// 表单登录
        .loginPage("/authentication/require")
        .loginProcessingUrl("/login")
        .successHandler(myAuthenticationSuccessHandler)
        .failureHandler(myAuthenticationFailureHandler)
        .and()
        .authorizeRequests() // 授权配置
        .antMatchers("/authentication/require",
                     "/login.html",
                     "/css/*",
                     "/code/image").permitAll()
        .anyRequest()  // 所有请求
        .authenticated()
        .and()
        .csrf().disable(); // 都需要认证
}
上面代码中,我们注入了ValidateCodeFilter,然后通过addFilterBefore方法将ValidateCodeFilter验证码校验过滤器添加到了UsernamePasswordAuthenticationFilter前面。
重启项目,简单测试一下: