
SpringBoot整合mybatis
目录
警告
本文最后更新于 2023-03-17,文中内容可能已过时,请谨慎使用。
导入依赖
以MySQL数据库为例:
<dependency>
    <groupId>org.mybatis.spring.boot</groupId>
    <artifactId>mybatis-spring-boot-starter</artifactId>
    <version>2.3.0</version>
</dependency>

<dependency>
    <groupId>com.mysql</groupId>
    <artifactId>mysql-connector-j</artifactId>
    <scope>runtime</scope>
</dependency>
注意: 一定要注意 mybatis-spring-boot-starter 和 SpringBoot 版本对应,否则会无法启动
具体版本对应关系见官方仓库.
本教程使用的是 SpringBoot 2.7.9 对应 mybatis-spring-boot-starter 2.3.x.
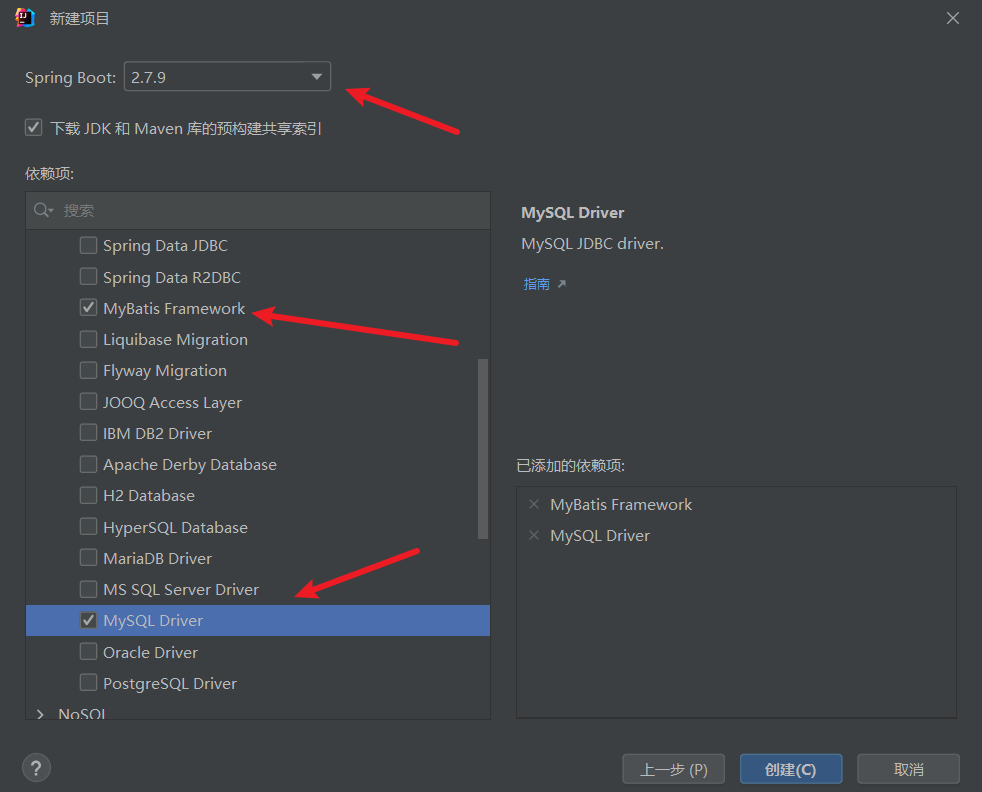
更简单的方式是在 IDEA 创建项目时,勾选上 mybatis, 项目会根据 SpringBoot 版本帮你自动选择好
添加配置
spring:
  datasource:
    username: root
    password: 123456
    url: jdbc:mysql://localhost:3306/db?serverTimezone=Asia/Shanghai&useUnicode=true&characterEncoding=utf-8
    driver-class-name: com.mysql.cj.jdbc.Driver
创建实体类
建表语句和初始数据可从这里获取
@Data
@NoArgsConstructor
@AllArgsConstructor
public class User {
    private Integer id;
    private String name;
    private Integer age;
    private String email;
}
UserController
@RestController
@RequestMapping("/user")
public class UserController {
    @Autowired
    private UserMapper userMapper;

    @GetMapping("/all")
    public List<User> getAllUser() {
        return userMapper.queryAllUser();
    }

    @PostMapping
    public User getUserById(@RequestBody Integer id) {
        return userMapper.queryUserById(id);
    }

    @PostMapping("/add")
    public int addUser(@RequestBody User user){
        return userMapper.addUser(user);
    }

    @DeleteMapping("/delete")
    public int deleteUser(@RequestBody Integer id){
        return userMapper.deleteById(id);
    }

    @PostMapping("/update")
    public int updateUser(@RequestParam Integer id,
                          @RequestParam String name) {
        return userMapper.updateUserNameById(id,name);
    }
    @GetMapping("/info")
    public List<Map<String,Object>> getPartInfo() {
        return userMapper.getPartInfo();
    }
}
基于注解方式实现 Mapper
@Mapper
public interface UserMapper {

    /**
     * 返回所有用户数据
     * @return
     */
    @Select(value = "select * from user")
    List<User> queryAllUser();
    /**
     * 根据用户id返回对应用户的数据
     * @return
     */
    @Select("select id,name,age,email from user where id=#{id}")
    User queryUserById(Integer id);

    /**
     * 插入新的用户数据
     * @param user 新用户
     * @return
     */
    @Insert("insert into user(id,name,age,email) values(#{id},#{name},#{age},#{email})")
    int addUser(User user);

    /**
     * 删除用户
     * @param id 删除的用户id
     * @return
     */
    @Delete("delete from user where id=#{id}")
    int deleteById(Integer id);

    /**
     * 更新用户的名称
     * @param id 用户id
     * @param newName 用户的新用户名
     * @return
     */
    @Update("update user set name=#{newName} where id=#{id}")
    int updateUserNameById(Integer id,String newName);

    /**
     * 返回用户的部分字段信息
     * @return
     */
    @Select("select id,name,email from user")
    List<Map<String,Object>> getPartInfo();
}
开启驼峰命名转换
下面再创建一个blog_info表
数据表使用下划线式命名,java中实体类更倾向使用驼峰式命名
create table blog_info
(
    id int auto_increment primary key,
    blog_title  varchar(30) not null,
    blog_author varchar(20) not null
);
实体类
@Data
@AllArgsConstructor
@NoArgsConstructor
public class BlogInfo {
    private int id;
    private String blogAuthor;
    private String blogTitle;
}
BlogInfoController 类
@RestController
@RequestMapping("/blog")
public class BlogInfoController {
    @Autowired
    private BlogInfoMapper blogMapper;
    @GetMapping("/all")
    public List<BlogInfo> getAllBlog() {
        return blogMapper.getAllBlogInfo();
    }

    @PostMapping("/add")
    public int addBlog(@RequestBody BlogInfo blogInfo) {
        return blogMapper.addBlog(blogInfo);
    }

    @PostMapping("/update")
    public int updateBlogInfo(@RequestBody BlogInfo blogInfo) {
        return blogMapper.updateBlogInfo(blogInfo);
    }
}
BlogInfoMapper 类
@Mapper
public interface BlogInfoMapper {
    @Select("select id,blog_title,blog_author from blog_info")
    List<BlogInfo> getAllBlogInfo();

    @Insert("insert into blog_info(blog_title,blog_author) values(#{blogTitle},#{blogAuthor})")
    @Options(useGeneratedKeys = true, keyProperty = "id")
    int addBlog(BlogInfo blogInfo);

    @Update("update blog_info set blog_title=#{blogTitle}, blog_author=#{blogAuthor} where id=#{id}")
    int updateBlogInfo(BlogInfo blogInfo);
}
这时候访问http://localhost:8080/blog/all,结果为
[
	{
		"id": 1,
		"blogAuthor": null,
		"blogTitle": null
	},
	{
		"id": 2,
		"blogAuthor": null,
		"blogTitle": null
	}
]
因为MyBatis无法查询出属性名和数据库字段名不完全相同的数据
如果需要将下划线数据库字段和实体类的驼峰式字段对应,需要添加下面的配置
mybatis:
  configuration:
	map-underscore-to-camel-case: true
这时候访问http://localhost:8080/blog/all,结果为
[
	{
		"id": 1,
		"blogAuthor": "aaa",
		"blogTitle": "1111"
	},
	{
		"id": 2,
		"blogAuthor": "aaa",
		"blogTitle": "222"
	}
]
基于 xml 方式实现 Mapper
首先需要在application.yml中添加下面的配置
mybatis:
    # 实体类所在的包路径
    type-aliases-package: cc.bnblogs.newdemo.pojo
    # mapper xml实现扫描路径
    # xml文件保存在resource下的mapper文件中
    mapper-locations: classpath:mapper/*.xml
接下来我们重构之前用注解实现的UserMapper类,就是将方法上面的注解注释掉
@Mapper
public interface UserMapper {

    /**
     * 返回所有用户数据
     * @return
     */
//    @Select(value = "select id,name,age,email from user")
    List<User> queryAllUser();
    /**
     * 根据用户id返回对应用户的数据
     * @return
     */
//    @Select("select id,name,age,email from user where id=#{id}")
    User queryUserById(Integer id);

    /**
     * 插入新的用户数据
     * 设置id自增
     * @param user 新用户
     * @return
     */
//    @Insert("insert into user(name,age,email) values(#{name},#{age},#{email})")
//    @Options(useGeneratedKeys = true, keyProperty = "id")
    int addUser(User user);

    /**
     * 删除用户
     * @param id 删除的用户id
     * @return
     */
//    @Delete("delete from user where id=#{id}")
    int deleteById(Integer id);

    /**
     * 更新用户名
     * @param id 用户id
     * @param newName 用户的新用户名
     * @return
     */
//    @Update("update user set name=#{newName} where id=#{id}")
    // 不加@Param(key)也可以, 直接在xml中使用#{key}接收
    int updateUserNameById(@Param("id") Integer id,@Param("newName") String newName);

    /**
     *更新用户所有信息
     * @param user 新的用户数据
     * @return
     */
//    @Update("update user set name=#{name},age=#{age},email=#{email} where id=#{id}")
    int updateUser(User user);

    /**
     * 返回用户的部分字段信息
     * @return
     */
//    @Select("select id,name,email from user")
    List<Map<String,Object>> getPartInfo();
}
在resources/mapper文件夹新建一个UserMapper.xml
<?xml version="1.0" encoding="UTF-8"?>
<!DOCTYPE mapper
        PUBLIC "-//mybatis.org//DTD Mapper 3.0//EN"
        "http://mybatis.org/dtd/mybatis-3-mapper.dtd">
<!--映射到UserMapper-->
<!--namespace为mapper类的全路径-->
<mapper namespace="cc.bnblogs.newdemo.mapper.UserMapper">

    <!--id为唯一表示,type为实体类全路径-->
    <!--映射到User实体-->
    <resultMap id="BaseResultMap" type="cc.bnblogs.newdemo.pojo.User">
            <!--主键和其他属性-->
            <!--property为实体类属性名,column为数据库列名 -->
            <id property="id" column="id" jdbcType="INTEGER"/>
            <result property="name" column="name" jdbcType="VARCHAR"/>
            <result property="age" column="age" jdbcType="INTEGER"/>
            <result property="email" column="email" jdbcType="VARCHAR"/>
    </resultMap>


    <!--id的值必须和数据处理层的接口名一致-->
    <!--映射到Mapper类接口的方法-->

    <select id="queryAllUser" resultType="User">
        select * from user
    </select>

    <insert id="addUser">
        insert into user(id,name,age,email) values(#{id},#{name},#{age},#{email})
    </insert>

    <update id="updateUserNameById">
        update user set name=#{newName} where id=#{id}
    </update>

    <update id="updateUser">
        update user set name=#{name},age=#{age},email=#{email} where id=#{id}
    </update>

    <!--
    在删除数据的时候,自动会返回受影响的行数,
    不需要在delete节点中定义返回类型,
    只有在查询数据的时候才会定义返回类型-->

    <!-- 删除用户数据根据id
    Integer deleteUserById(int id)
    parameterType: 指定参数类型,这里也可以不需要指定
    -->
    <delete id="deleteById">
        delete from user where id=#{id}
    </delete>


    <select id="queryUserById" resultType="User">
        select * from user where id=#{id}
    </select>

    <select id="getPartInfo" resultType="java.util.Map">
        select id, name,age from user
    </select>

</mapper>
总结
基于xml方式的实现 Mapper 的一些要点:
- 传入的参数是实体类时,
#{}可以填入实体类的属性@Param("")注解中给出的参数值是Map中的key,调用方法时给出的参数值是 Map 中的value值,而最终在XML文件中使用#{}获取值,其实是使用 Map 中的get(key)方法获取的- 如果接口方法中的参数类型是基本类型的可以不用
parameterType指定类型,如果不是基本类型的,规范要求需要使用parameterType指定类型,但是可以不写- 增加,修改,删除,方法返回的永远是受影响的行数
- 要是
<select>节点,那么必须写返回类型resultType,无论是基本型还是其他类型- 返回多条实体记录时,
resultType的值依旧是实体类,而不是List<User>- 在定义实体类属性的时候,尽量使用包装类
使用 Druid 数据库连接池
信息
补充知识,可和上面的教程一起了解
导入依赖
<dependency>
    <groupId>com.alibaba</groupId>
    <artifactId>druid-spring-boot-starter</artifactId>
    <version>1.2.11</version>
</dependency>
常用配置
Spring:
    # 配置MySQL
    datasource:
        username: root
        password: 123456
        url: jdbc:mysql://localhost:3306/db?serverTimezone=Asia/Shanghai&useUnicode=true&characterEncoding=utf-8
        driver-class-name: com.mysql.cj.jdbc.Driver
        druid:
            # 连接池配置
            initial-size: 10
            min-idle: 10
            maxActive: 200
            maxWait: 60000
            # 检测可以关闭的空闲连接间隔时间
            timeBetweenEvictionRunsMillis: 60000
            minEvictableIdleTimeMillis: 300000
            validationQuery: SELECT 1 FROM DUAL
            testWhileIdle: true
            testOnBorrow: false
            testOnReturn: false
            # 打开PSCache,并且指定每个连接上PSCache的大小
            poolPreparedStatements: true
            maxPoolPreparedStatementPerConnectionSize: 20
            connectionErrorRetryAttempts: 3
            breakAfterAcquireFailure: true
            timeBetweenConnectErrorMillis: 300000
            asyncInit: true
            remove-abandoned: true
            remove-abandoned-timeout: 1800
            transaction-query-timeout: 6000
            # 配置监控统计拦截的filters, 去掉后监控界面sql无法统计, wall用于防火墙
            filters: stat,wall,log4j2
            connectionProperties: druid.stat.mergeSql\=true;druid.stat.slowSqlMillis\=5000
            # WebStatFilter配置
            web-stat-filter:
                enabled: true
                # 添加过滤规则
                url-pattern: "/*"
                # 忽略过滤的格式
                exclusions: "*.js,*.gif,*.jpg,*.bmp,*.png,*.css,*.ico,/druid/*"
            # 配置监控
            stat-view-servlet:
                enabled: true
                url-pattern: "/druid/*" # 访问路径为/druid时,跳转到StatViewServlet
                allow: 127.0.0.1 # ip 白名单
                deny: # ip 黑名单 (共同存在时,deny优先于allow)
                reset-enable: false # 是否能够重置数据
                login-username: admin # 需要账户名和密码才能访问控制台
                login-password: admin
SpringBoot 项目需要在启动类上加
@ServletComponentScan注解
访问http://localhost:8080/druid/会自动跳转到控制台的登录界面

更多配置信息请访问官方 wiki 文档

